Students observe worms at different stages of their life cycle. They recognise characteristics of living things such as moving and reproducing, and demonstrate an understanding that a worm is a living thing
Learning objective
Students look at worm features and adaptations that help them to survive. They compare a live worm to a labelled diagram of a worm, create a scientific drawing and record their observations. They also observe worms at different stages of their life cycle.
Treat the worms gently while observing as they are very fragile. Release them back into the worm farm after examining them.
Curriculum links
Biological sciences
Questioning and predicting
Planning and conducting
Processing and analysing data and information
Cross-curriculum priority: Sustainability
Adaptations, physical characteristics, environment, behaviours, body coverings, body parts, survival
Worm farms contain composting worms that eat food scraps and turn them into a natural liquid (worm leachate) and compost (castings) that can be used in the garden. Composting worms thrive in a moist, high nutrient environment and we create this environment in a worm farm.
Worm farms:
- Decrease the amount of organic waste sent to landfill.
- Close the recycling loop by changing food waste back into organic fertiliser for growing food.
- Reduce greenhouse gases. In a well-maintained worm farm the decomposition process is aerobic (with oxygen), rather than anaerobic (without oxygen).
The earthworms used in worm farms are a different species to those we find in our garden. The best worms for worm farming are European worms such as the red wriggler (lumbricus rubellis) and the tiger worm (eisenia fetida). These species are accustomed to soils high in nutrients. They eat and breed much faster than other earthworms and can quickly transform food scraps into worm castings. They do this in a small amount of space, while other earthworms are better equipped for burrowing and searching for food in our drier, nutrient poor soils.
Worms are blind, but sensitive to light. Their instinct is to move away from light due to their two ‘photoreceptors’, which are sensitive nerve endings located near the saddle (Murphy, 2005).
Worms have three to five hearts depending on the species and breathe through their skin. We can identify its ‘head’ as it is the end closest to the saddle (clitellum), a band around the worm. It moves through the soil by contracting and expanding its muscles and using its bristles (setae) to grip the soil.
A few handfuls of worms and castings from your worm farm, including some juvenile worms and capsules
One plastic lid per pair (white ice cream container lids are ideal)
Magnifying glasses or magnifying cups
Science journal
Scales (fine if possible)
Torch
Worm diagram
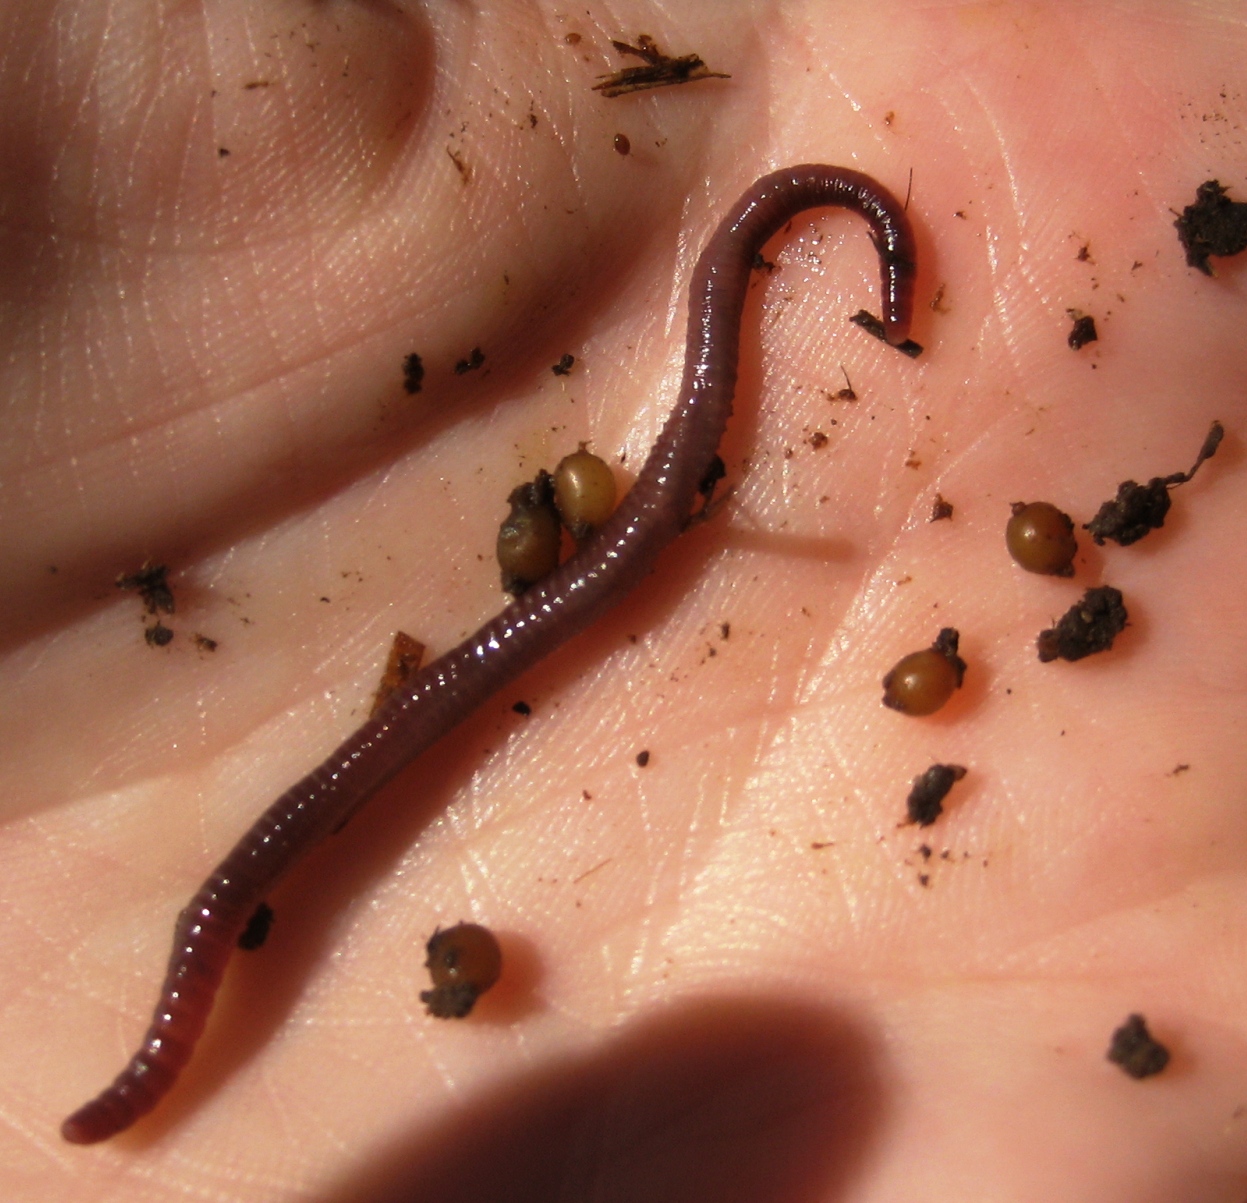
- Show the class pictures of a worm capsule and an adult worm (figures 2 and 3). Ask the students what they think the worm capsule is.
- Spread the worms and their castings out on a plastic sheet and ask the class to identify a worm capsule, a juvenile worm (which is smaller and sometimes lighter in colour than an adult worm), and an adult worm.
- Before distributing live worms, explain to students that the worms must be treated gently and touched as little as possible.
- Distribute the worms to the students on a plastic container. Add a drop of water to keep the worm moist.
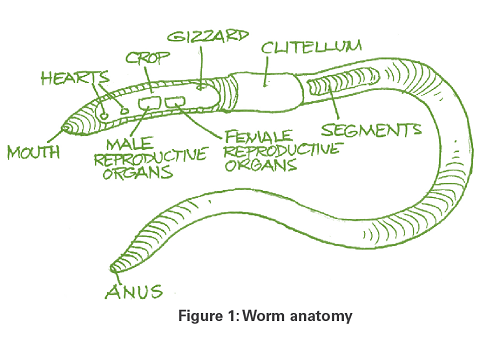
- Ask students to observe a live worm, using a magnifying glass, and produce a scientific drawing. Scientific drawings must be clear and well labelled (head, tail, segments). It should be titled and enclosed in a simple border using a ruler and pencil.
- Provide a detailed drawing of a worm (Figure 1) and have students identify: (a) clitellum; (b) anus; (c) mouth; (d) segments.
- On a separate piece of paper, record the length of the worm, as well as general observations about the worm:
- smell
- colour
- number of segments
- can you find the worm’s head and tail?
- does it have eyes, a nose, hair, or mouth?
- how does the worm’s skin feel?
- do you think the worm has a skeleton?
- how does the worm move?
- does the worm have any special features? Describe them.
- Return worms to the worm farm.
- Discuss animal features and adaptations compared to humans. For example, humans need arms and legs to move around – worms do not because they have a long, slender body ideal for moving through soil. Humans wear sunglasses to protect their eyes from the glare of the sun, but worms do not because they spend most of their time underground in the dark and do not have eyes.
Create a class table for recording the measurements of the worms. Students can calculate the average or create charts using this information.
Students can create posters or PowerPoint presentations on the lifecycle of a worm.
Read ‘A Diary of a worm’ by Doreen Cronin and have students complete their own diary or journal of worm work in the term.
For more lessons related to worms, please view the waste wise schools worms curriculum guide www.wasteauthority.wa.gov.au/wws/teaching-resources/list/curriculum_guide
Useful resources
‘Waste wise worm farming’ and ‘How to make a fridge worm farm’ fact sheets: www.wasteauthority.wa.gov.au/wws/teaching-resources/list/fact-sheets
Costa’s guide to worm farming and composting for households: www.youtube.com/watch?v=eNqRXM2c6L8